Replacing Failed Disks
This process is for a failed disk. For replacing a disk that has not failed see here Replacing a Drive Prior to Failure
Replacing a Disk
Another disk of the same or greater capacity is required to replace a failed disk. This disk must be installed in the TrueNAS system, not part of an existing storage pool, and available to use as a replacement. The replacement process wipes any data on the replacement disk.
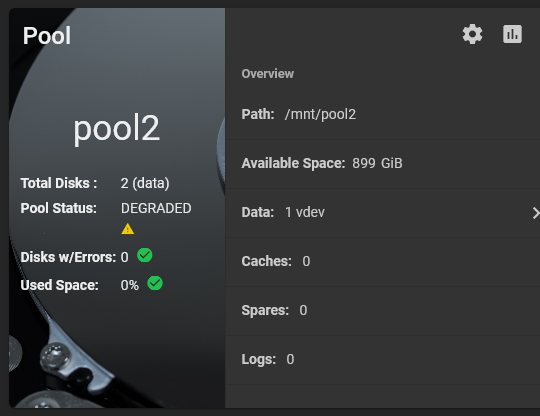
The TrueNAS Pool widget on the main Dashboard shows when a disk failure degrades a pool.
Click the settings on the pool card to go to the Storage > Pools > Pool Status screen to locate the failed disk.
To replace a disk:
- Take the disk offline.
- Remove, or replace the disk.
- Refresh the screen.
- Bring the disk online.
Taking a Failed Disk Offline
Clicking more_vert for the failed disk to show the disk options.
We recommend you take the disk offline before starting the replacement. This removes the device from the pool and can prevent swap issues. To offline a disk:
Go to Storage > Pools screen, click on the settings settings icon, and then select Status to Open the Pool Status screen and display the disks in the pools.
Click the more_vert icon for the disk you plan to remove, and then click Offline.
Select Confirm, then click OFFLINE. The disk should now be offline.
When the disk status shows as Offline, physically remove the disk from the system.
Replacing a Disk
If the replacement disk is not already physically added to the system, add it now.
If replacing a failed disk with an available disk in the system, click Replace, select an available disk from the dropdown list, then click Replace.
To update the Pool Status screen and show the new disk, click Refresh.
In the Pool Status, open the options for the offline disk and click Replace
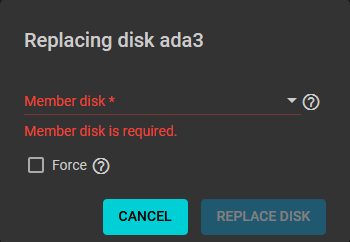
Select a new member disk and click Replace Disk. The new disk must have the same or greater capacity as the disk you are replacing. The replacement fails when the chosen disk has partitions or data present. To destroy any data on the replacement disk and allow the replacement to continue, set the Force option.
When the disk wipe completes and TrueNAS starts replacing the failed disk, the Pool Status changes to show the in-progress replacement.
TrueNAS resilvers the pool during the replacement process. For pools with large amounts of data, resilvering can take a long time.
Bringing a New Disk Online
When the resilver completes, the pool status screen updates to show the new disk, and the pool status returns to Online.
During the failed disk replacement process, take these actions after removing and replacing the physical disk to make that replacement disk available:
- Go to Disks and locate the offline disk
- Click the more_vert icon for the offline disk
- Click Online.


No Comments