Convert VHD to VHDX using Hyper-V Manager and Powershell
In this article, we will look at the step by step procedure to convert VHD to VHDX.
Advantages of VHDX
First, let’s look at some of the advantages of VHDX:
- Scalable up to 64 TB
- 4 KB block size and better performance
- Protection against data corruption during power outages
- VHDX file can be resized online
- Better snapshot handling
Methods to Convert a VHD to VHDX
There are two methods you can use to convert a VHD into a VHDX file:
- Using Hyper-V Manager
- Using PowerShell
Points to be noted before conversion
- VHDX files cannot be used on versions of Hyper-V prior to Windows 8 or 2012
- For upgrade scenario, first, upgrade Hyper-V to VHDX supported version then convert VHD
- Conversion is performed offline
- Do not attempt to convert a VHD to a VHDX if any of the following are true:
- You have created a snapshot of the virtual machine
- You are replicating the VHD using Hyper-V Replica
- The VHD is the parent to one or more differential virtual hard disks
Convert VHD to VHDX using Hyper-V Manager
Microsoft Hyper-V team has provided a simple way to convert existing VHDs into VHDX using Hyper-V Manager
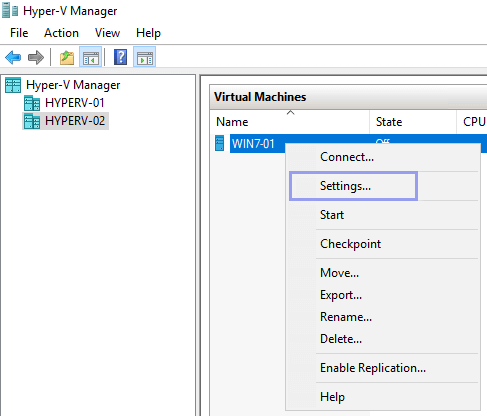
- Launch Hyper-V Manager, select and right-click on the virtual machine whose disk you want to convert from VHD to VHDX. Then, choose settings
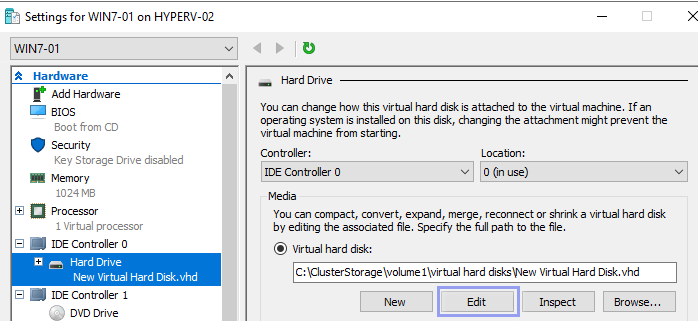
- From Edit Virtual Hard Disk Wizard, Select the disk you want to convert and Click Next
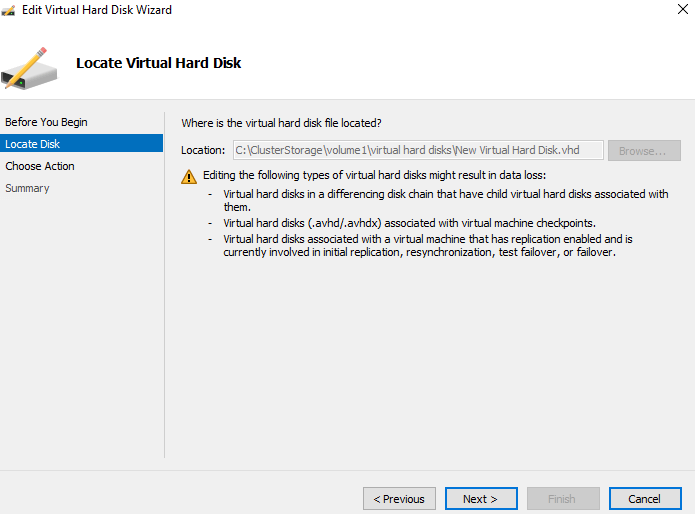
- Click Next from Locate Disk Page
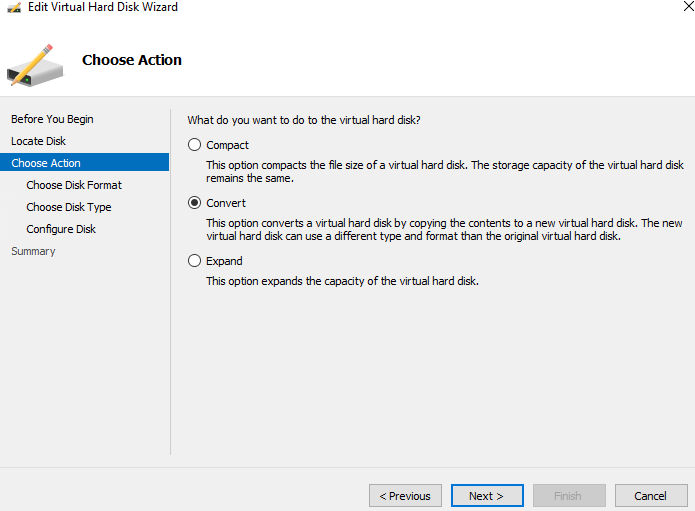
- Select Convert and click Next
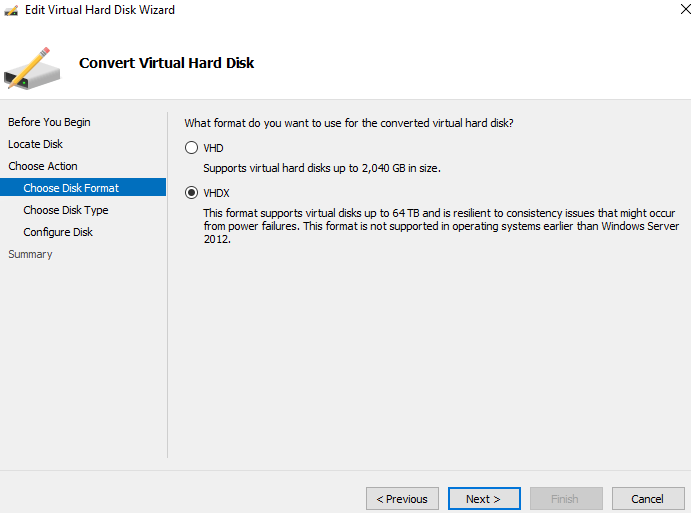
- Select the VHDX format and click Next
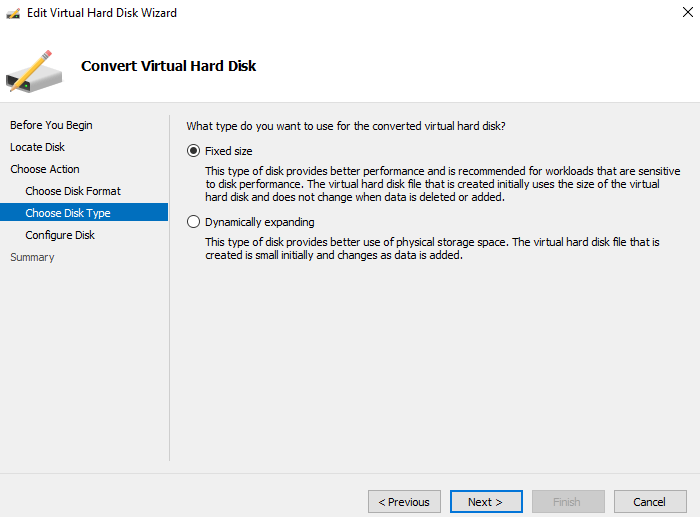
- Select the type of converted disk you need, either a dynamically expanding or fixed-size VHDX file and Click Next
- From the Configure Disk option, provide a location to save and name for new converted VHDX file, Click Next

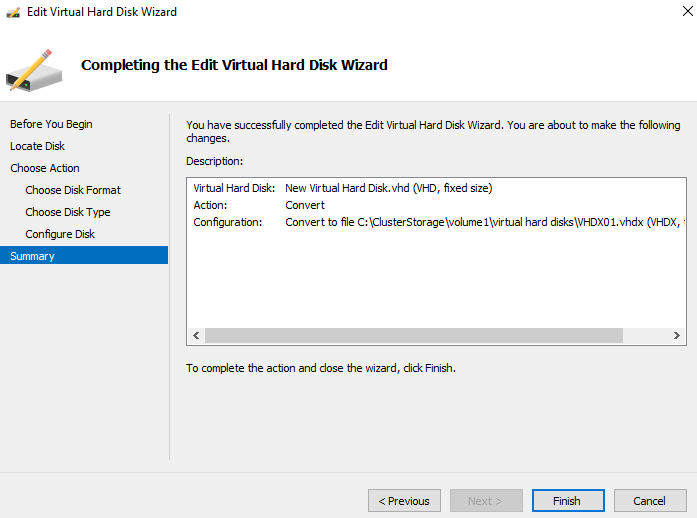
- Click Finish to start the conversion on the Summary page
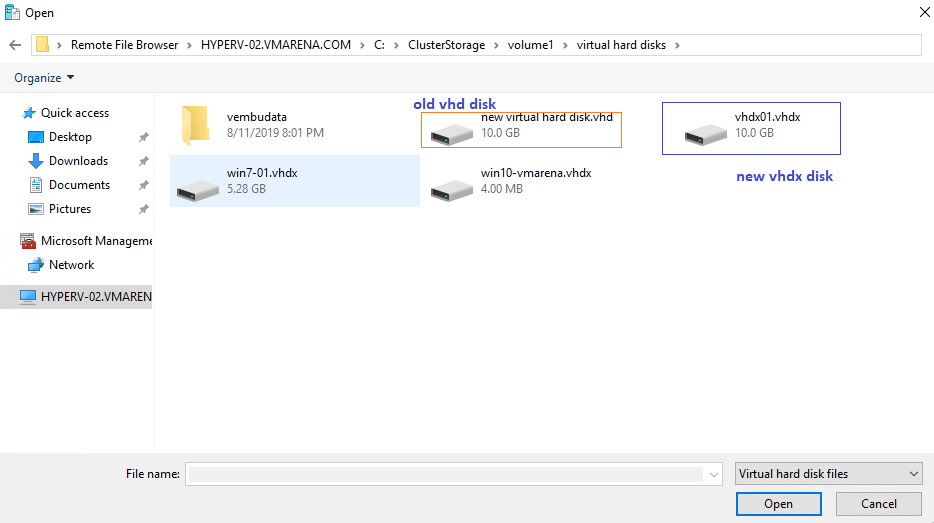
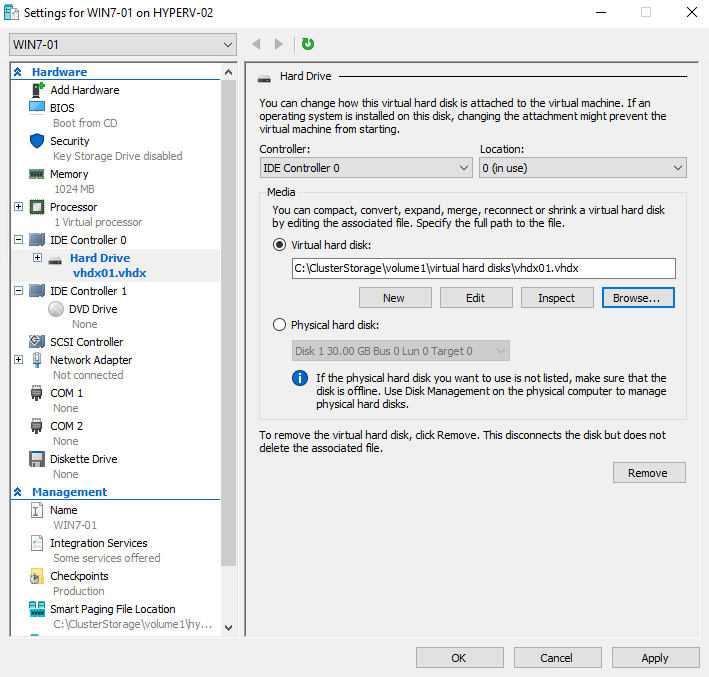
- Conversion will take time that is based on the size of the disk and backend storage. Once completed, open the settings of the virtual machine and replace the VHD with the VHDX. To do that, open the source VHD file, click on browse and navigate to the location newly created VHDX disk
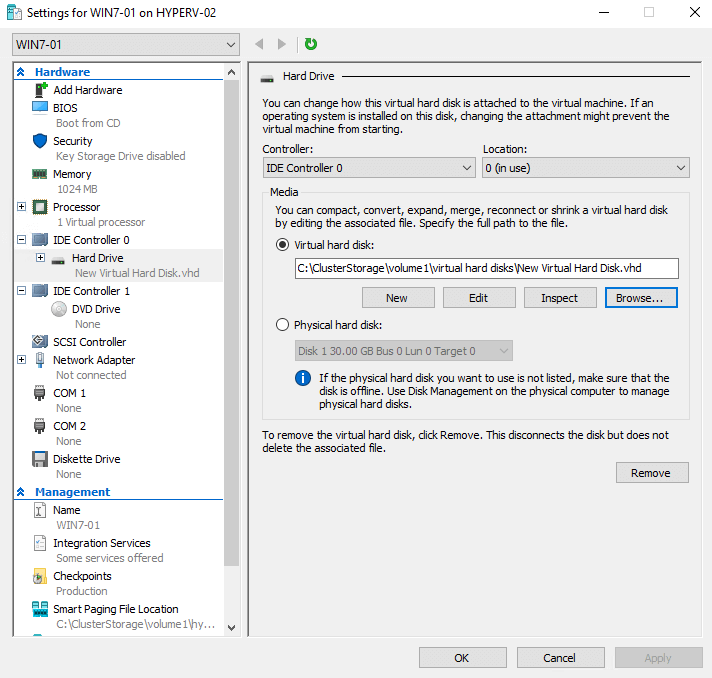
- Select the disk and Click open
- Click Ok and Start and test the virtual machine
Once the converted disk is available in the virtual machine and it works fine, you may remove the old VHD file
Convert VHD to VHDX using PowerShell
Another method is, we can use to convert VHD to VHDX is PowerShell and this will avoid the time-consuming wizards used by the Hyper-V manager.
Follow below command to convert a VHD to a VHDX
Convert-VHD –Path “Source vhd file” –DestinationPath “Destination vhdx file”
Example:
Convert-VHD –Path d:\VM01\Disk0.vhd –DestinationPath d:\VM01\Disk0.vhdx
This command is very useful when you want to use a script to automate lots of VHD conversions across many virtual machines.
Change the Disk Physical Sector Size
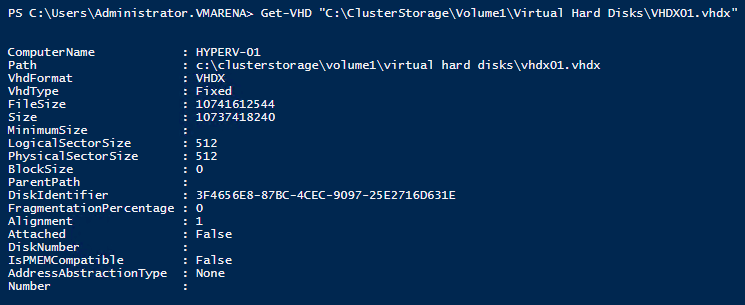
As I mentioned above VHDX will support 4K blocks, after conversion default block size 512 will not change. You have to manually change that, follow below commands to check the converted disk sector size and how to modify to 4K.
Check the Disk Sector Size
Get-vhd “VHDX File Name with Location”
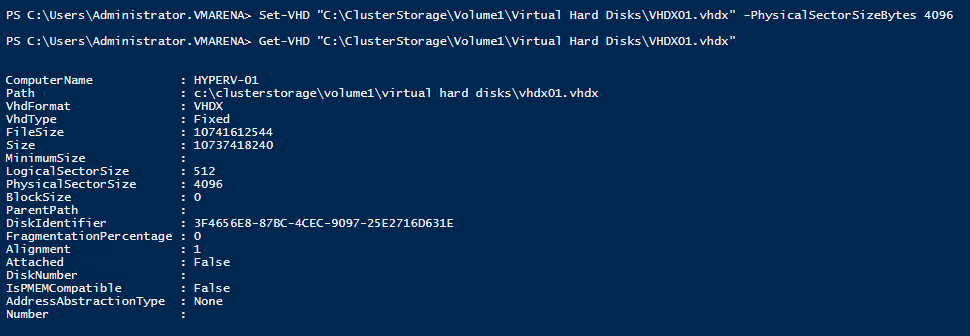
Set the Disk Sector Size
set-vhd “VHDX File Name with Location” -PhysicalSectorSizeBytes 4096
Now you have a virtual machine that is using the best kind of virtual machine storage, the VHDX format virtual hard disk.
#HyperV #Hyper-V #Powershell #VHDX #VHD