# How to Set Up CodeProject.AI on Blue Iris
## How to Set Up CodeProject.AI on Blue Iris
We will look at how to set up CodeProject.AI on Blue Iris below, installing it on the same server where Blue Iris is currently running. Please keep in mind that you can run the software somewhere else if you’d like and connect to it through Blue Iris.
1\. Navigate to the [CodeProject.AI website](https://www.codeproject.com/AI/index.aspx) and download the latest Windows installer. Please keep in mind that you can run this inside of a Docker container as well if you’d rather offload the processing to another device. After the download finishes, extract the contents and run the installer.
[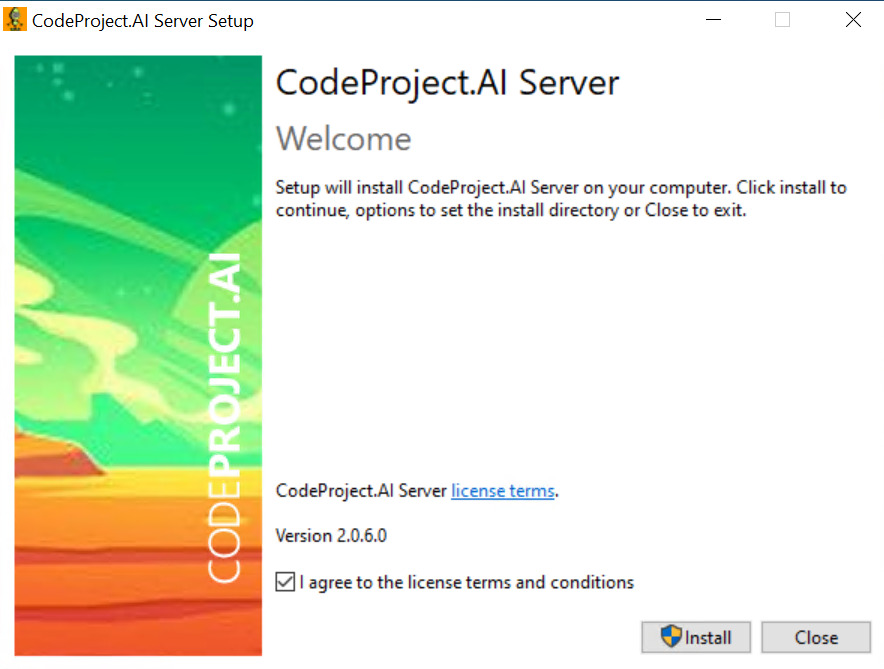](https://docs.coltscomputer.services/uploads/images/gallery/2024-06/OdtoCz1oBYSdg86Q-image-65.jpg)
2\. After CodeProject.AI is installed, you must configure Blue Iris. **This process will be different for everyone, meaning that you must configure some of these settings based on your requirements, but I’ll do my best to create a general example below.**
Open the **Settings** menu, select **AI** and check off **Use AI server on IP/port.** As long as CodeProject.AI is installed properly, you should be able to leave all these settings as-is, however, if you’d like better object detection, that can be changed to high. CodeProject.AI also has facial recognition, but that’s out of the scope of this tutorial. When you’re comfortable with the settings, select **Start Now**.
[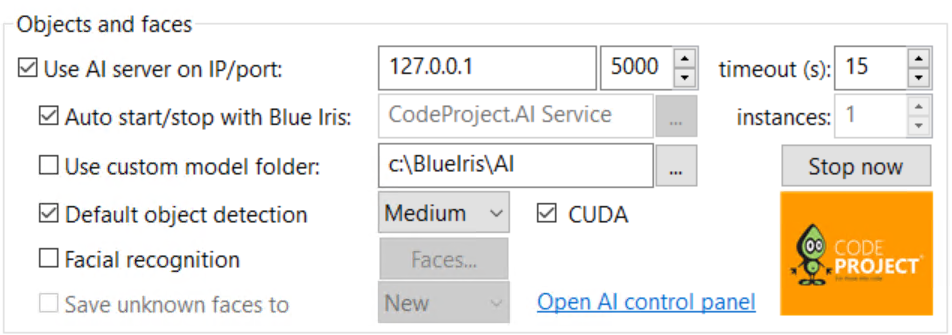](https://docs.coltscomputer.services/uploads/images/gallery/2024-06/bxy4Jd95V9uKRJII-image-65.png)
### CodeProject.AI Configuration
Now that CodeProject.AI is installed and configured on Blue Iris, we can move on to setting up triggers and alerts. **As mentioned above, there are no *correct* settings in this regard, meaning that you must understand how this all works and apply it to your requirements.**
1\. Make sure your cameras are added to Blue Iris, then select the **Trigger** tab. Ensure that **Motion Sensor** is selected, then **Configure** the settings. Alter the **minimum object size**, as well as the **minimum contrast** and **duration**. If you’d like to highlight objects when triggered, you can enable that.
[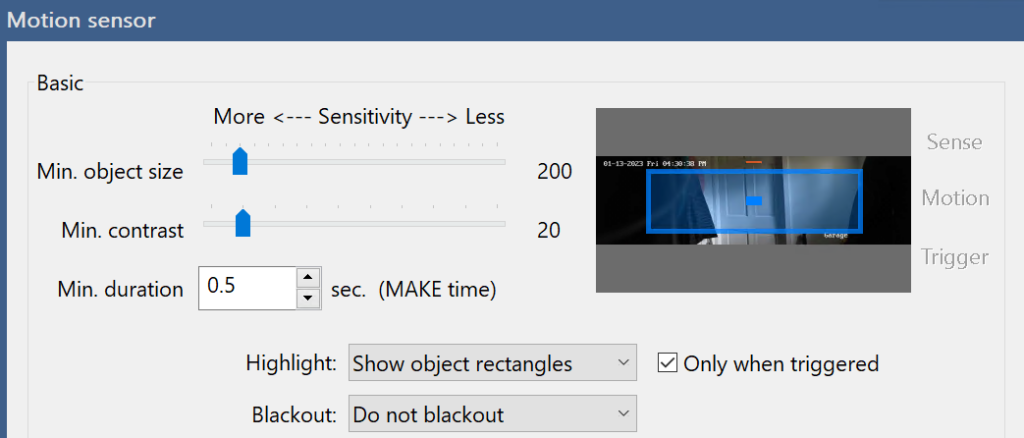](https://docs.coltscomputer.services/uploads/images/gallery/2024-06/iAuHNZr9muSO9cCE-image-24-1024x438.png)
2\. The settings in the **Advanced** section can be changed as well, though these specific settings will depend on the type of camera you’re using, where it’s located, as well as (potentially) many other factors.
[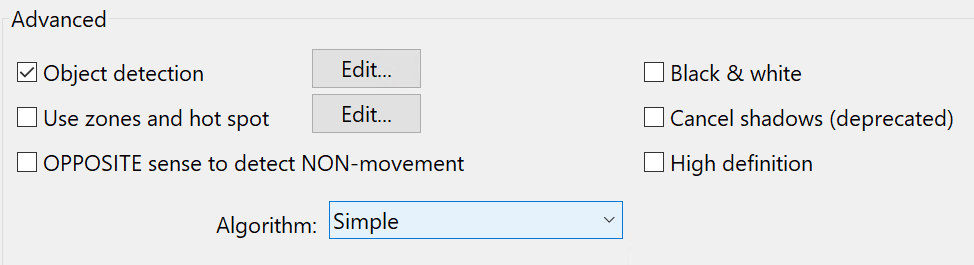](https://docs.coltscomputer.services/uploads/images/gallery/2024-06/MQgPr6bp3YHoNQTM-image-25.png)
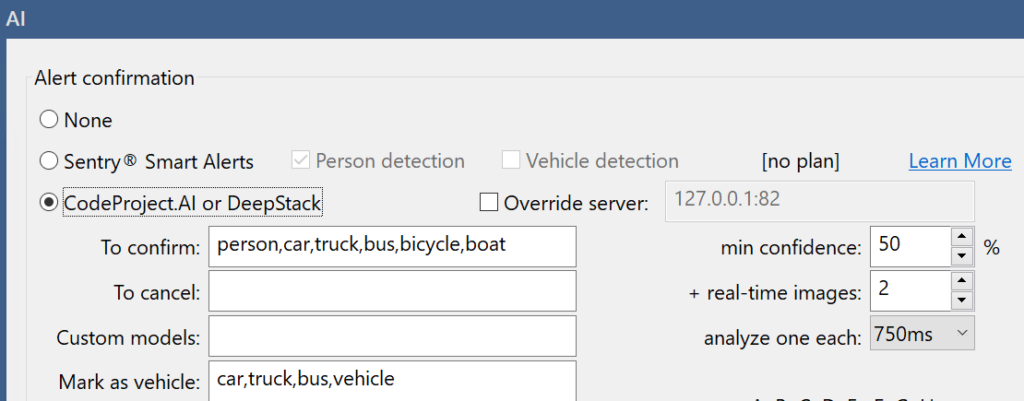
3\. Next, in the **Trigger** tab, select **Artificial Intelligence** and ensure that **CodeProject.AI or DeepStack** is selected. This is also the location where you can add or remove the type of objects you’d like to detect. You can also modify the **real-time images** as well as the duration (**analyze one each**) to increase performance.
[](https://docs.coltscomputer.services/uploads/images/gallery/2024-06/pu3DIyPrdKXEyshF-image-26-1024x401.png)
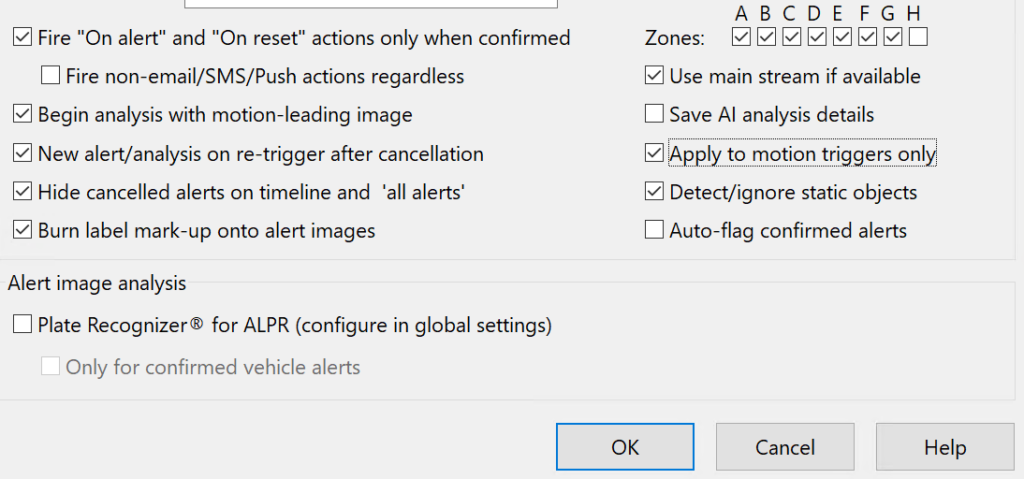
4\. There are additional settings you can select as well to complete specific actions, though there isn’t an individual setting that would generally apply to all.
[](https://docs.coltscomputer.services/uploads/images/gallery/2024-06/cPXenCVAOpDO7KTj-image-27-1024x479.png)
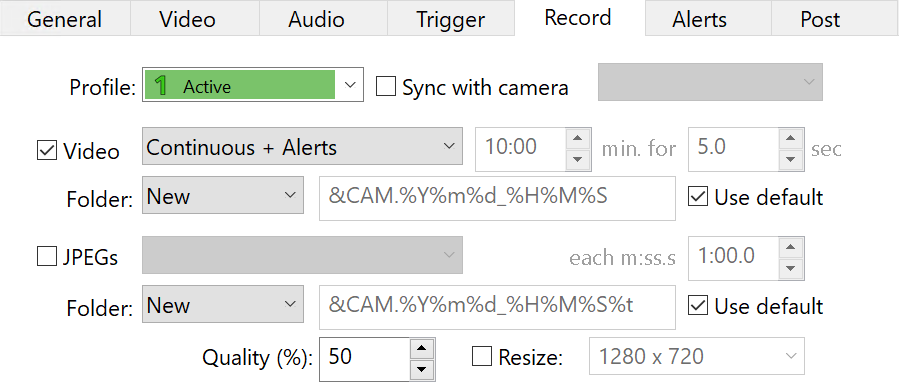
5\. Finally, in the **Record** tab, change the **Video** to **Continuous + Triggers** or **Continuous + Alerts** and select **OK.** CodeProject.AI is now configured! **Please keep in mind that you’ll have to do this for each camera (if you’re not syncing the settings) and the options may differ** **based on the location of the camera or many other factors.**
**If you’d rather not record continuously, you can also change this setting to one of the other options.**
[](https://docs.coltscomputer.services/uploads/images/gallery/2024-06/r948uBNuBQPcfExD-image-28.png)
### Alert Actions – How to Set Up CodeProject.AI on Blue Iris
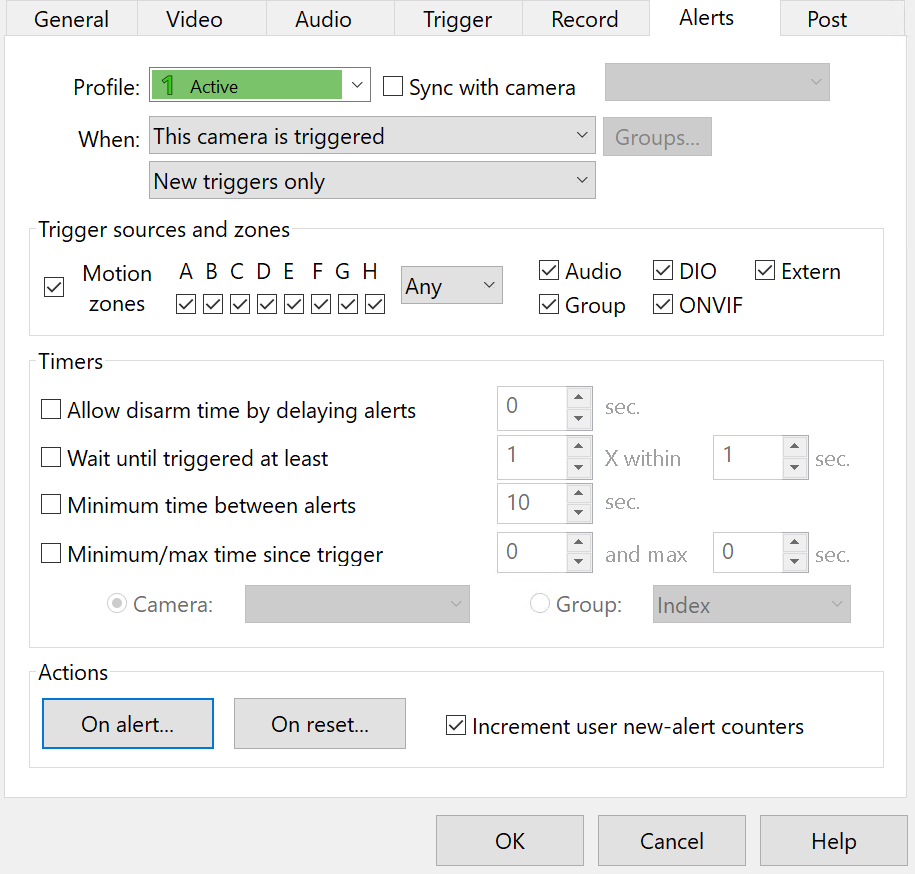
If you’re interested in configuring actions that occur based on the type of AI detected, you can access the settings in the **Camera Settings**, **Alerts**, then **On Alert.**
[](https://docs.coltscomputer.services/uploads/images/gallery/2024-06/dJC4KjSuPXonfaL7-image-29.png)
There are *various* types of alerts you can specify here, but the key that you want to be aware of is the **required AI object** section after selecting an alert type. This will allow you to specify when an alert is sent based on the type of AI object that’s detected.
[](https://docs.coltscomputer.services/uploads/images/gallery/2024-06/mzyKykRetNJ3q2y9-image-32-1024x204.png)
## Conclusion: How to Set Up CodeProject.AI on Blue Iris
This tutorial looked at how to set up CodeProject.AI on Blue Iris. Please keep in mind that this is an extremely basic implementation of CodeProject.AI and you can get extremely granular by setting up alert actions. The true power of CodeProject.AI is unleashed when alerts are configured for specific AI objects, so spending time to determine the type of object and alert (even for specific profiles, like during the night or while at work) is incredibly powerful.