BlueIris NVR
Configuring BlueIris
Install the BlueIris NVR software onto the system
Best practice is to install BI onto a stand alone system with dedicated Hardware
After installing BI follow these steps
- Setup Storage
- It is recommended that you do not use an SSD for video storage. Best practice is to use HDDs.
- In the storage tab of BI settings, find the New folder section.
- Set folder size in GB to 90% of the disk drive, especially if using the C drive as the storage
- Set clips to delete based on space
- Find the Stored folder section. Set size to 0.
- Next configure users for logging into the webserver if necessary
- navigate to the webserver
- Enable the HTTP webserver and enable it. Change port number as needed.
- Enable the HTTPS on LAN.
- Optionally forward the necessary port to allow remote access to server
- Click the Advanced button
- Check
Direct-to-wire where possible (H.264)
- Service Account
- Open the local user manager MMC and create a new BI service account
- Set password to never expire
- set password to user cannot change password
- Save the new user
- Add the new user to the local administrators group
- In the BlueIris settings startup tab, set the
Run as Windows Serviceoption.- enter the username and password of the new bi service account we just created
- Cameras
- Right click in the UI and select the
Add new cameraoption - Name the camera and hit OK
- enter the IP address of the camera you will be adding
- selecting the find/inspect option should find the cameras on the network
- enter the username and password for logging into the camera
- Change the camera settings as desired
-
Click the Video tab
-
Check
Limit decoding unless required -
Click the Record Tab
-
Click Video file format and compression... (in this window make sure
Blue Iris DVRis selected andDirect-to-discis selected) -
Under Video Compression click the Configure... button
-
Check
Direct-to-wire where possible (H.264), your camera will need to be configured for H.264 instead of H.265.
-
- Confirm the camera is showing in the BI UI
- Right click in the UI and select the
How to Set Up CodeProject.AI on Blue Iris
How to Set Up CodeProject.AI on Blue Iris
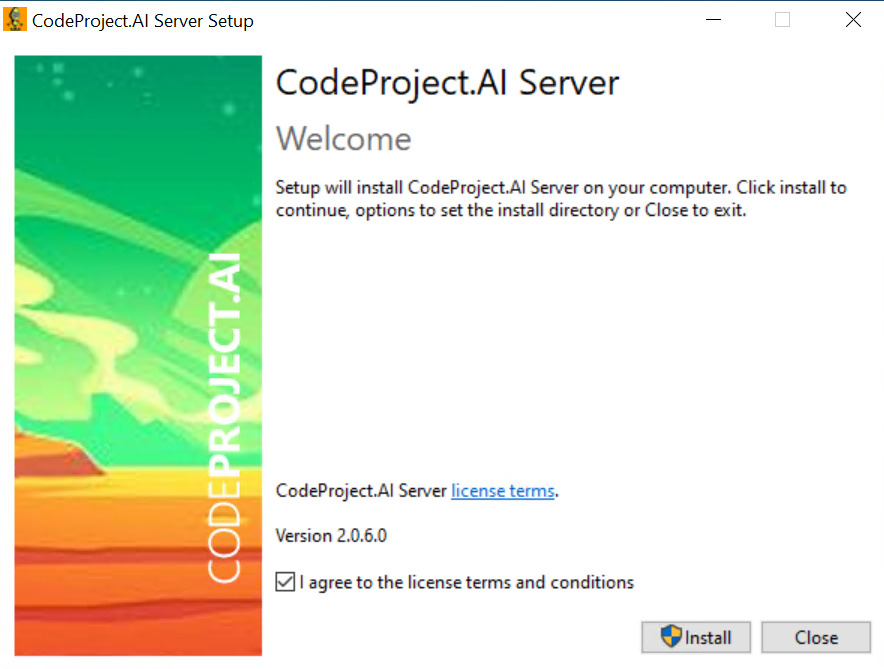
We will look at how to set up CodeProject.AI on Blue Iris below, installing it on the same server where Blue Iris is currently running. Please keep in mind that you can run the software somewhere else if you’d like and connect to it through Blue Iris.
2. After CodeProject.AI is installed, you must configure Blue Iris. This process will be different for everyone, meaning that you must configure some of these settings based on your requirements, but I’ll do my best to create a general example below.
Open the Settings menu, select AI and check off Use AI server on IP/port. As long as CodeProject.AI is installed properly, you should be able to leave all these settings as-is, however, if you’d like better object detection, that can be changed to high. CodeProject.AI also has facial recognition, but that’s out of the scope of this tutorial. When you’re comfortable with the settings, select Start Now.

CodeProject.AI Configuration
Now that CodeProject.AI is installed and configured on Blue Iris, we can move on to setting up triggers and alerts. As mentioned above, there are no correct settings in this regard, meaning that you must understand how this all works and apply it to your requirements.
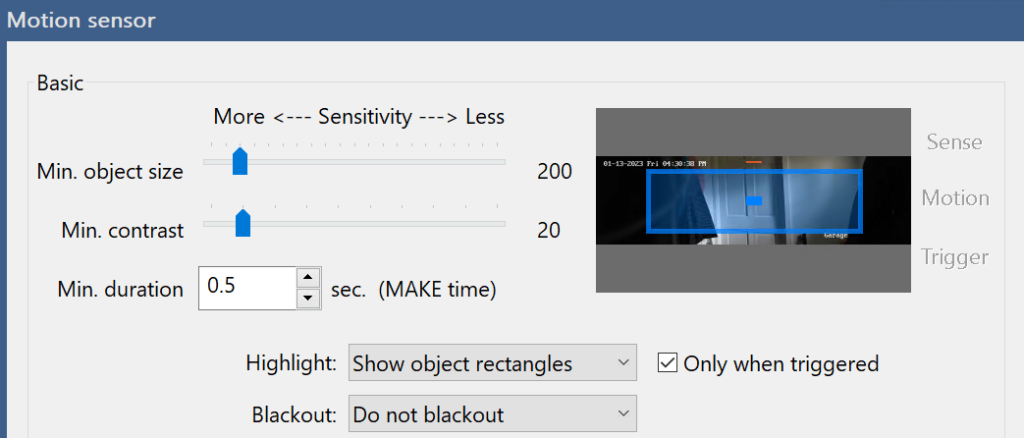
1. Make sure your cameras are added to Blue Iris, then select the Trigger tab. Ensure that Motion Sensor is selected, then Configure the settings. Alter the minimum object size, as well as the minimum contrast and duration. If you’d like to highlight objects when triggered, you can enable that.
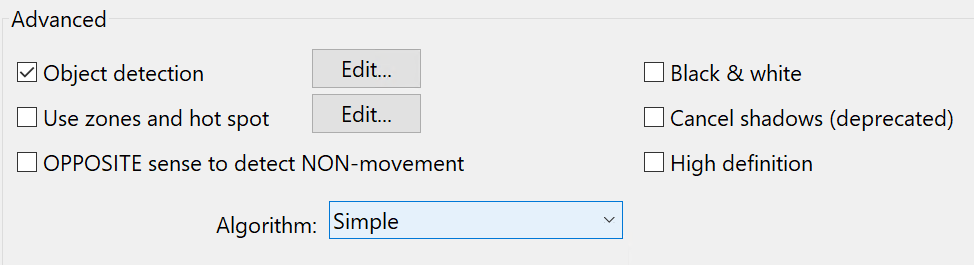
2. The settings in the Advanced section can be changed as well, though these specific settings will depend on the type of camera you’re using, where it’s located, as well as (potentially) many other factors.
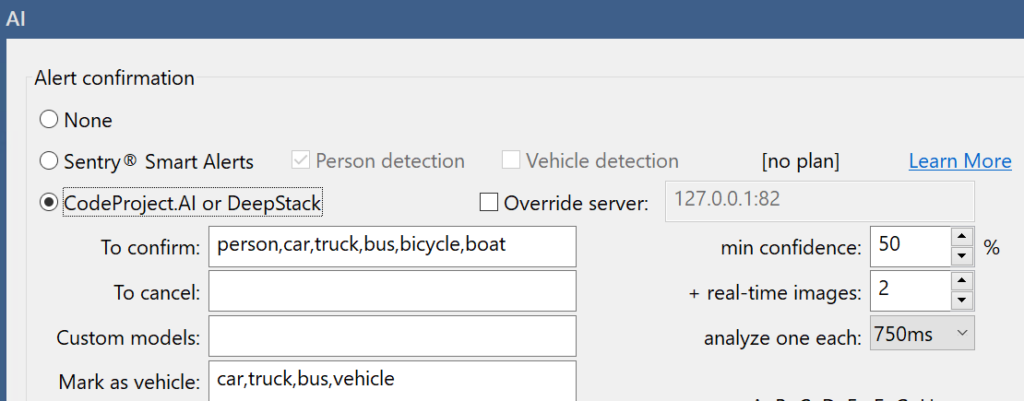
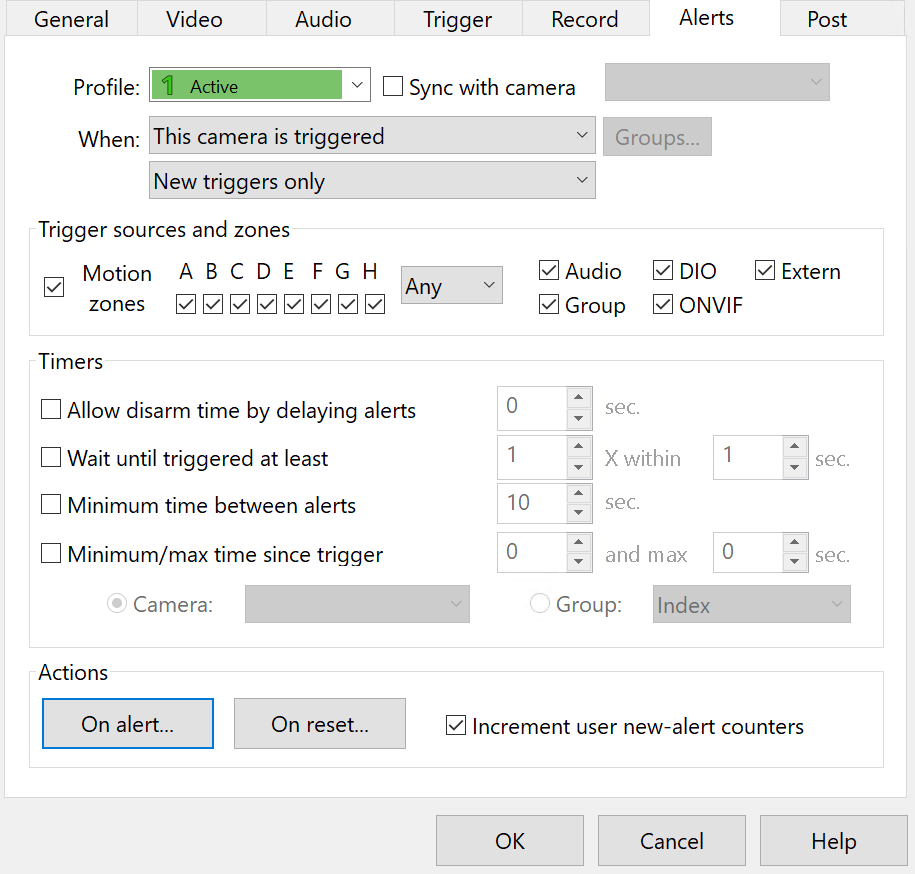
3. Next, in the Trigger tab, select Artificial Intelligence and ensure that CodeProject.AI or DeepStack is selected. This is also the location where you can add or remove the type of objects you’d like to detect. You can also modify the real-time images as well as the duration (analyze one each) to increase performance.
4. There are additional settings you can select as well to complete specific actions, though there isn’t an individual setting that would generally apply to all.
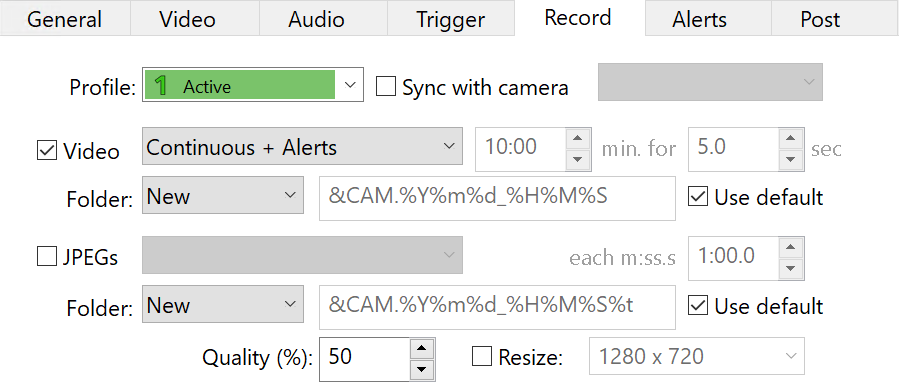
5. Finally, in the Record tab, change the Video to Continuous + Triggers or Continuous + Alerts and select OK. CodeProject.AI is now configured! Please keep in mind that you’ll have to do this for each camera (if you’re not syncing the settings) and the options may differ based on the location of the camera or many other factors.
If you’d rather not record continuously, you can also change this setting to one of the other options.
Alert Actions – How to Set Up CodeProject.AI on Blue Iris
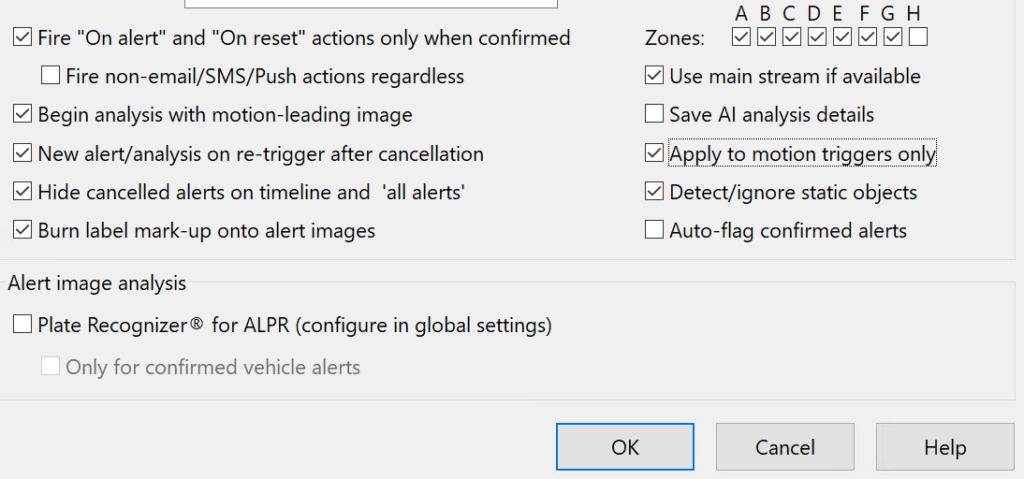
If you’re interested in configuring actions that occur based on the type of AI detected, you can access the settings in the Camera Settings, Alerts, then On Alert.
There are various types of alerts you can specify here, but the key that you want to be aware of is the required AI object section after selecting an alert type. This will allow you to specify when an alert is sent based on the type of AI object that’s detected.

Conclusion: How to Set Up CodeProject.AI on Blue Iris
This tutorial looked at how to set up CodeProject.AI on Blue Iris. Please keep in mind that this is an extremely basic implementation of CodeProject.AI and you can get extremely granular by setting up alert actions. The true power of CodeProject.AI is unleashed when alerts are configured for specific AI objects, so spending time to determine the type of object and alert (even for specific profiles, like during the night or while at work) is incredibly powerful.
Migrating BlueIris to New Server
Step One: Copy Files To A New Storage Hard Drive

The first step you need to take is to copy your Blue Iris files to the hard drive of the new computer, or to whatever storage device you are going to keep them on.
If you are going to move your existing hard drive to the new computer, you can skip this step. It is easiest to move the entire hard drive, since it saves you a bunch of copying, but either option is completely fine.
This process can take a bit of time, especially if you have a lot of footage archived, so it is best to start on this as soon as possible.
You first need to locate the folder where you have your files stored. Once you have located the files, you must create a new folder on the new storage device.
Then you can copy the files from the old folder to the new one. As mentioned, you can skip this step if you plan on moving your entire hard drive to the new computer.
Make sure not to forget about the “New” and “Alert” files. These are temporary files. Every time Blue Iris is triggered, it temporarily saves itself to a faster area of storage in case multiple cameras go off at the same time.
This helps to avoid any bottlenecks in writing data to the drive. You need to find where these files are located and move them to the new storage device as well.
Step Two: Export All Of Your Blue Iris Settings
Once you have completed the long task of moving your files over, you need to export all of your personal Blue Iris settings.
The chances are high that you, like me, have fine-tuned and personalized your camera settings to make them your version of perfect, so this step is incredibly important.
That small fine-tuning really defines your personal NVR software.
To complete this step, go into your Blue Iris menu and click on settings. On the “About” tab, there should be a button that says “Export Settings.”
Blue Iris has a database where it holds onto all of your thumbnails, alerts, triggers, and other things like that. This is almost more important than saving the settings.
Go to the “Clips & Archiving” tab and look at where your database currently resides. Once you find your database’s location, go to a file explorer and navigate to the database location. Copy everything in there over to your new storage device.
Step Three: Import The Settings You Just Exported
For this step, you need to head back to your new Blue Iris server to import all of your just exported settings. This is important as the settings are what runs your personalized software.
To complete this step, you once again need to go into the Settings and click on the “About” tab. When you do this, you will see the option to import your settings.
Click on that, find the file from earlier, and click “OK.” This step is simple but very important to ensure that your settings copy over.
Step Four: New Storage Locations And New Paths
Since you are using a new computer, you likely have new paths and new storage locations.
You need to go into the Settings and change these to go where you have chosen to save these new paths. A good way to do this is to go into your “New” and “Alert” files section from earlier and change that storage location.
Step Five: Make Sure Everything Is Working
This is a good time to check your cameras to ensure that everything is functioning 100% the way that it should be. You should be able to see that all of your cameras are online with this new setup.
This step usually takes me a few minutes, but it is worth the time to make sure the cameras are exactly where you want them.
Step Six: Activate Your Software
Go back into your old email files and find your original Blue Iris activation code to put it into the activation screen. This is a good time to restart the Blue Iris software if it does not force itself to restart.
You also need to set up your port forwarding information to access your Blue Iris software outside your network. Once that is done, you should be able to access your software from the mobile app and see things live.
Though the steps are fairly straightforward, some other questions may arise when you move Blue Iris to a new computer.
Why Do I Need to Re-Enter My Activation Code?
You need to do this because you have installed the Blue Iris software on more than one PC at this point. Every PC requires an individual license, so you can move the license from one PC to another by re-using the registration code.
How Do I Reinstall Blue Iris?
To reinstall your Blue Iris software, you first need to access your Control Panel and go to the “Uninstall a Program” section. Once your computer has restarted and uninstalled the program, load the Blue Iris software and update it as you usually would.
Will Blue Iris Run On Linux?
As of right now, Blue Iris is not available on Linux. However, there are other alternative programs that you can find to run on Linux.
How Do I Upgrade Blue Iris?
The answer to this question depends on which Blue Iris software you are attempting to upgrade. However, you can find most of the instructions for any update easily on the Blue Iris website.
For example, if you are updating Blue Iris 4 to Blue Iris 5, you need to install the full version 5 before uninstalling version 4.